This post was originally posted on Medium.
You’re working on an app and have found a pod that does something very similar to what you need. Oh no! It turns out the pod doesn’t do exactly what you need it to but almost. Being a 🌟 developer, you decide to modify the pod to fit your app’s specific needs.
So what are your options? How do you make changes to the pod and include those in your project?
Duh. Fork the library.
Although there’s a couple of ways to achieve this.. the understood go-to option is to fork the library and update your Podfile to point to the fork.
Over the years, I’ve repeatedly encountered a number of annoyances that have made me wonder if there’s another path to achieving this. These being:
1. Keeping the fork up-to-date.
The moment you fork, you lose the automatic fixes to that library that you might otherwise get if you hadn’t forked and had the pod version described with an optimistic operator pod ‘PODNAME’, ’~> 0.1.2’. You must now remember to rebase this regularly if you wish to take advantage of fixes or optimizations that may have happened in the original repository. 😢
2. Reviewing changes done in a fork.
When working in a team and changes to a lib are necessary, it can be hard for a team to review changes that have happened in another repository as well as the actual PR that makes use of the modified library.
Should there be two PR’s? How do you coordinate them effectively?
3. Multiple projects require the same library with different modifications.
Perhaps a problem more prevalent in development agencies: sometimes one library is used in two products with two different design specifications and therefore require two completely different changes to the library.
Do you fork the library twice? Do you create branches in the fork for each project? How do you keep track of this?
4. Is it safe to delete this fork?
The forks likely live in your Git/hub/xxx profile/organization and start to fill up your list of repositories. When you inevitably decide to clean up unused repositories, you may mistakenly delete a fork that’s being used by another project. Oops.
But what if there was a way for changes to pods to live in the repository that those changes belong to?
No way you say. It’s magic you say.
Enter the cocoapods-patch gem!
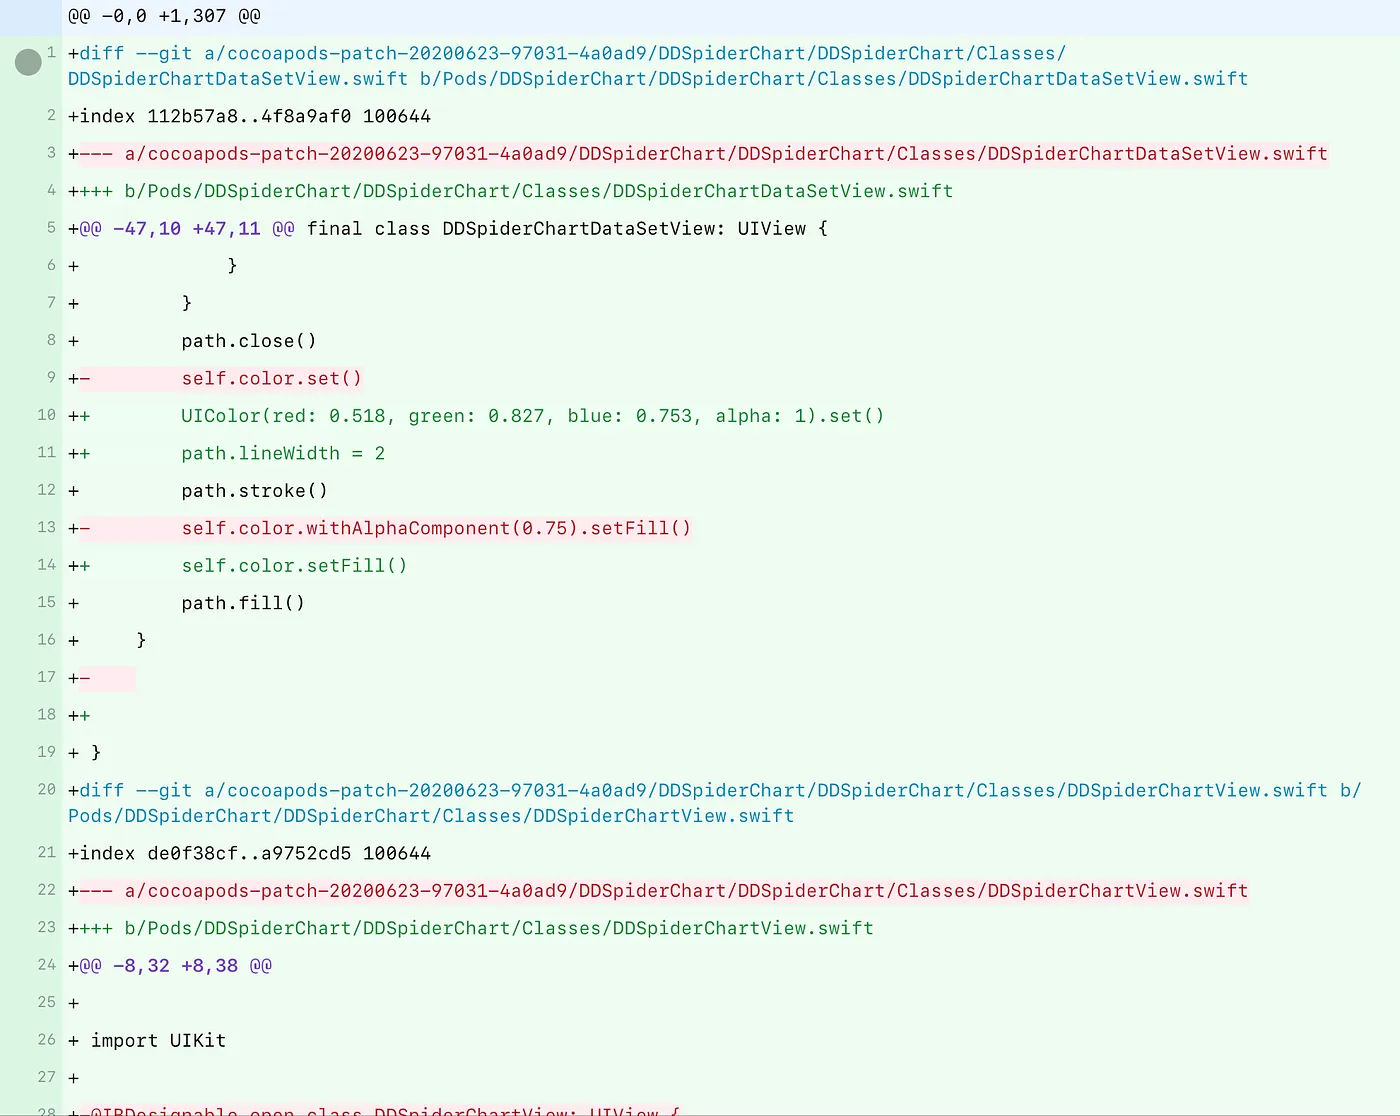
Here’s an idea. Could we not just compare a modified version of a pod against a cleanly installed pod, see what the difference is, save that and apply those changes after a pod install?
We can, and that’s what the cocoapods-patch ruby gem does! 🎉 💎
Wait.. What does it do?
This ruby gem allows you to modify a pod locally then run a command to generate a patch file — a git diff of your changes against the unmodified pod. Furthermore, if you include the gem as a plugin in your Podfile it will automatically apply any available patches after a pod install.
Besides the benefit of having the changes live within a repository and being able to review them as part of your normal review process, it has the added benefit that you can easily update a pod and test whether the patches will still successfuly apply.
How do I use this magical gem?
The great thing is that cocoapods is also a ruby gem, so your environment should already be set up and ready to be able to use it!
Step 1: Install the gem
All you have to do is run gem install cocoapods-patch. If you’re using a Gemfile (good you for you) you can add this line gem 'cocoapods-patch'.
Step 2: Modify a cocoapod
Make changes to an installed cocoapod! 💪
Step 3: Generate a patch
Run the command pod patch create POD_NAME. This will create a patches/POD_NAME.diff file in your repository which you can add and commit to your repository.
Step 4: Add Podfile plugin for automatic patching
Add plugin ’cocoapods-patch’ to your Podfile — this will add a hook that will apply all patches during a pod install.
That’s it! That’s all it takes. It’s that easy 🚀
It’s important to note that there are situations where forking might be better. For example when changes are too consequential or when the changes would be generally useful for others and you have time to make a proper PR to upstream.
Thanks for reading this article! I hope this tool makes the hassles of modifying pods simpler and easier for you and your team. Have some thoughts?
I’d love to hear them! 😊 Reach out to me on Twitter.